For many coffee aficionados, there is something magical about the aroma of fresh roasted coffee beans. The satisfying crackle and pop sounds coming from the roaster add to the anticipation. While buying pre-ground coffee is certainly convenient, roasting raw beans yourself allows for nuanced customization and unmatched freshness. From light cinnamon roasts to dark espresso roasts, the possibilities are endless.
Roasting may seem intimidating to start, but with a few key techniques and tips by farm-to-cup coffee workshop, you can master the art of home coffee roasting.
Choosing Your Beans
Coffee beans come from the seeds of the coffea plant’s cherries. While there are over 120 species of coffee plants, the two most common varieties used for commercial coffee are Coffea arabica (canvassed as higher quality) and Coffea canephora, known as robusta. Arabica beans are considered more delicate with flavor notes like fruit, sugar and wine. Robustas have a grain-like, peanutty flavor with a stronger punch of caffeine.
When selecting green (raw) beans, opt for whole beans over pre-ground to maximize freshness. Look for beans grown in reputable coffee-producing regions like Costa Rica, Colombia, or Ethiopia. Local roasters and specialty shops will offer samplers so you can try beans from different locations.
Setting Up Your Home Roaster
Home roasting can be done using simple pans or pots on the stovetop but for more control, a dedicated roasting machine is ideal. Some top brands include Fresh Roast, Behmor and Hottop. Expect to spend $200-$600 depending on features. Look for roasters that allow adjusting time, temperature and agitation. A chaff collector is useful for containing skin that comes off the beans. You’ll also need a way to cool the beans quickly after roasting – this could be a baking sheet, metal colander or another surface. Have a thermometer on hand to check bean temperature.
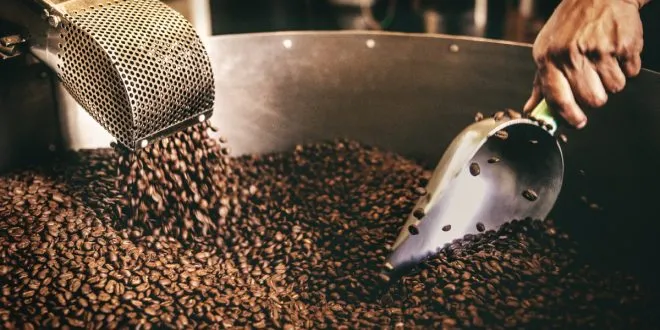
The Roasting Process
Once your roaster is fired up, add your raw beans. Most machines hold between 4 ounces to 1 pound. As the beans heat up, listen for the “first crack” popping sound around 400°F. This is when the beans expand in size and start to brown. Shortly after, oils will begin releasing indicating the “second crack.” You can stop roasting after first crack for lighter roasts or wait until second crack for fuller body and richer flavor.
A typical roast takes 8-15 minutes. Darkness depends on temperature, time, and bean variety. Past second crack, you risk burnt tasting beans. Some tips during the process – try to keep the beans moving for even roasting. Keep vents open to allow smoke to release. Watch closely and make note of times, sounds and smells for adjusting future roasts.
Cooling and Storing
After your desired roast color is reached, the beans must be cooled quickly to stop the roasting process. Pour them out onto a baking sheet or place the roasting chamber in front of a fan. Allow 15-20 minutes for the beans to rest before storing or grinding. Air-tight containers like mason jars work for storage. Oxygen, light and heat are enemies of fresh roasted beans. Enjoy within 1-2 weeks for ultimate flavor.
Grinding and Brewing Your Roast
Experts recommend grinding roasted beans immediately before brewing. Use a quality burr grinder with settings matched to your planned brew method. For drip makers, target a medium grind size. Espresso requires a very fine powder-like consistency. If storing pre-ground beans, use an airtight container and brew within a few days.
When it’s finally time to savor your home-roasted coffee, start with a taste profile and ratio you enjoy. Boiled, French press, pour over and cold brew are all great options. Pay attention to flavor nuances that come through from your custom roast. Make adjustments to the roast profile and method for subsequent batches.
Key Tips for Home Roasting Success
– Start with quality green beans and sample different varieties
– Invest in a roasting machine that allows temperature and time controls
– Listen for first and second crack during roasting
– Cool beans quickly after roasting
– Store in airtight containers and use within 1-2 weeks
– Choose grind size matched to your brew method
– Take notes on your process for adjusting future roasts
The Joy of Roasting at Home
While home roasting requires some equipment and a learning curve, being able to create fresh custom roasts makes it worthwhile for passionate coffee lovers. You gain control over every step of the process from bean origin and roast degree to the perfect grind for your morning cup. The aromas and sounds make for an immersive, multi-sensory experience. Share some bags with friends and get their feedback. Roasting coffee at home brings new appreciation for each sip. Getting into the craft allows for a deeper connection to the beans, the roast and the final product in your cup.