PC assembling is the process of putting together multiple parts of a desktop system. It may sound like an extremely difficult task. However, it is very interesting for anyone who has little interest in desktop systems.
If you are completely bored in this quarantine, and you have nothing productive to do, then you can choose to assemble a PC. There is nothing better than a thing that you make with your own hands. That is what we are going to focus on in this article today. We will be going to cover all the steps that a person requires to PC Zusammenstellen. The process may get complex at one time and messy at another time, but if you are determined to complete it, you eventually will. Let’s proceed towards the simple yet amazing steps for PC assembling.
Thins To Consider While Buying a Custom PC Using Configurator:
Cost- Custom PCs are available at a wide range of prices, depending on which components and if you have any extras like the water cooling.
Most businesses sell their various types of computers with lots of budgets in mind, and it will always be for everybody. The main issue with the creation of a custom PC is the design mark. These PCs do not pay a premium to one of these pre-constructed / customized devices. These PCs do not.
Warranty- Some of the most important points of sale for a preconstructed PC is a warranty, it is essential and seldom provided adequate attention.
Most of these companies provide only 1-year parts and 3- year work warranties. However, they can be expanded according to the device form you ordered or even developed warranty packages they can sell.
Customizability- It should also be noted how much you can adapt to the PC. It’s something we hate to say, but so many blogs and so many items you can personalize can’t cover it here, maybe. Therefore, if you take the specifics seriously, you have to check out other places and see precisely what you can customize.
Youtube Video Guide (PC Konfigurator)
Buy the necessary parts of a system to PC Configure
There is a list of necessary parts of a pc system. Before you actually start the assembling process, it is necessary to buy all the necessary parts. These parts include CPU, computer case, optical device, power supply, RAM, motherboard, SATA cables, processor fan, case fan, screws, hard drive, etc. There are multiple places you can get these things from. If you can visit an electronic store, get these pieces of equipment from there. However, if you are in strict quarantine, then it is better to do the shopping online from a well-reputed organization. You can order all of these things online and get started with the process.
Gather all the tools
Once you have all the equipment that you need to work on for PC assembling, the next step is to gather all the tools. For this purpose, you will require a screwdriver, needle-nose pliers, knife, wire cutters, grounding strap, heat sink compound, small flashlight, standoffs, a small container for holding the screws, and an adjustable wrench. You must be thinking that these are way too many tools. Well, the fact is, you don’t require to use them all in every installation. However, you don’t know when you need them, so it is better to get them all before you start the process so that there is not any hurdle during the assembling process.
Open computer case
Do you remember the computer case that you have bought before starting the assembling process? You need to start from that one. For the assembling process, open up the computer case by removing its side panels. You can use a screwdriver for this purpose. Hold the side panel of the computer case carefully, and use a screwdriver to open all the screws until the panel easily gets removed from the case. Do the same to the other side as well. The thing that you must need to focus on is that the case may have sharp edges, so you need to be very careful to avoid any sort of injury.
Prepare the case
Once you are done with removing the side panels of your computer case, the next step is to prepare the case for PC assembling. For this purpose, first, you need to remove any sort of packing material or extra things that are shipped to you inside the case. Next, you need to remove the cover for the optical drive. You can remove it by pressing the retaining tabs. Be very careful so that you don’t break anything. After that, notice all the cables that are already installed in the case. There will be connections to the power switch, audio jacks, and USB ports in the front panel. You need to understand which port is reserved for which purpose before you actually start the process.
Ground yourself
This is one of the most important steps, and you need to be very focused on it. Before you start doing work with multiple wires and other stuff, it is important to ground yourself to avoid any type of static electricity on your body to avoid any sort of damage to the various computer components. You can ground yourself by putting the grounding strap on your wrist and then connect the other end of the strap to the computer case. Your strap must have a hook that you will use to attach it to the computer case. Once you have successfully grounded yourself, move to the next step.
Install motherboard
The actual installation process starts from this step. For the installation of the motherboard, we have already purchased multiple items. There is an I/O Bezel that is a trim panel and is installed in the back of the computer case. It surrounds the interface ports of the motherboard, and it must be included along with the motherboard. After that, install the standoffs in the screw holes of the case. They will help to create a riser for the separation of the case and motherboard. Once done, install the lower motherboard in the computer case, and align it with the I/O bezel, and install the screws to confirm the installation.
Install hard drive
You must be aware that the hard drive is the device of your system that stores all of your system data. It has a width of 3.5 inches, and for gaining access to the cable connections at the back, you need to mount it. For this purpose, get a drive bay of 3.5 inches for the easy installation process of the drive. After that, slide the drive into the perfect place, and then check if the screw holes get lined up with the holes in the case for the installation of the screws. After that, install the screws to complete the installation process.
Install optical drive
The optical drive has a width of 5.25 inches. It is installed in the same drive bay that we have already removed the cover from previously. Also, the cable access must be noted for installation of this drive also. For installation, you need to slide the drive into the drive bay so that all the screw holes are lined up. It is necessary for the perfect installation, and when the screw holes are all lined up, we can tighten the screws to make the drive flush with the front of the computer case. It ensures that the orientation is correct and the screw installation is on point.
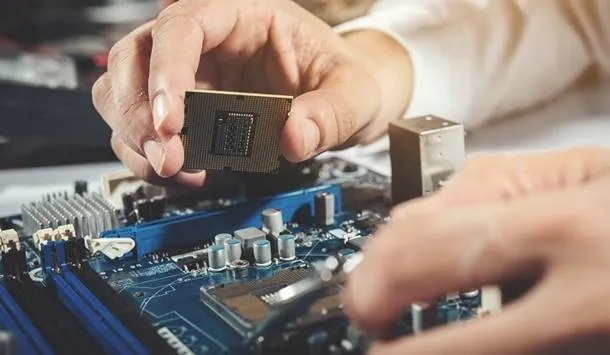
Install CPU
We all are well aware of the fact that the CPU is the brain of the computer. We need to install the CPU on the motherboard that we have already installed in the previous steps. For the installation, find the corner that has a mark of “pin 1” or with an arrow. After that, find the corresponding mark of the socket of the CPU, and then insert the CPU in a way that both the markings easily lined up. For lining up the markings, you need to lift the small metal rod, which is available next to the socket. After lining up the marks, push down the rod as it will lock the processor in its place.
Install RAM
RAM is the abbreviation of random access memory, and it is the temporary memory of the system. For the installation of RAM, you need to set the RAM board in the socket and then press it from both ends to ensure its complete insertion. To make sure that it is fitted correctly, check that the tabs lock into place.
Install the CPU fan
The CPU fan is very useful as it is a combination of heat sink and fan because it draws away from the heat from the CPU. For the installation, start with placing the thermal compound to the CPU at its location provided. After that, align the tabs of the fan for correct mounting on the CPU. Then, pull down the locking rod so that the fan locks into place, and then connect its power connector to the motherboard.
Install the case fan
The case fan installation process takes place at the back panel of the computer case. You can always check the documentation available with the case if you don’t find the accurate place. For installation, align the mounting holes by holding the fan onto the mounting pad that is available inside the case. After that, tighten the screws to confirm the installation.
Install power supply
This step is one of the most crucial steps in PC assembling. It requires deep concentration on the details in your case documents. After that, align the power supply and the mounting holes in the case together, and then insert the screws into the holes. Tighten the screws to ensure a perfect installation.
Connect cables
Once you are done with the previous installation, you will notice a jungle of wires that can be daunting. Every device that you have installed needs a power supply to work properly. The motherboard has two power connectors for SATA devices and non-SATA devices. Use the data cables to connect the drives and devices to the motherboard.
How can a PC Configurator help you?
The benefit of PC Konfigurator gives the freedom to pair PC parts that suits your taste. In the case of gaming pc, you are bound only to buy the whole package whether you like or dislike the entire hardware lineup. However, there are many benefits of custom PCs; the most important one is that they are built by experts (hardware specialists). Custom desktops are overclocked by default, whereas the parts are carefully selected after passing benchmark tests, this ensures hardware compatibility and smooth performance during operation.
Why should you choose PC Configurator?
CLS Computer believes that there is always a better way to configure your PC. A more intuitive way for the beginners to direct them purchasing the right parts for their computer. We are passionate about configuring computers and our mission is to help you to achieve the way. We focus on configuring computers and the way you can put the best of your computing experience. We are excited to simplify configuring computers through selling, repairing and servicing in Manheim and the surrounding area. Well, we have-
- long professional experience since its foundation in 1993
- very experienced customer dealings
- 100% customer satisfaction
- we are constantly improving our customer service
- More than 29 experienced, professional and competent employees
Once you are done with the installation of all the devices and components, the next step is to reinstall the side panels of the computer case. Your computer is all set up for turning on and software loading.