Are you planning to upgrade your outdoor space with an outdoor shower? Well, this article is your one-stop shop for all your needs!
Since 1981 the earth’s temperature is rising 0.32° F per decade. Therefore more people than ever are spending time outdoors.
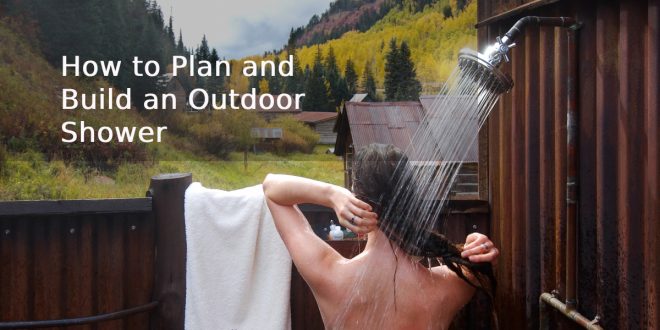
With plenty of mental and physical benefits, it is no wonder more people are spending time outside the house. But to make the most of the opportunity, you should build an outdoor shower.
How and what do you need to upgrade your yard?
Read on until the end to find out!

Locate and Sketch Your Outdoor Shower
Locating and sketching your project is the first place to start with every DIY build.
When you choose a location for your shower, it should be easily accessible to a water source. The easiest and most common way is to connect to your outdoor spigot, meant for your garden hose.
When you know the area for your shower, you can start sketching designs and ideas. Otherwise, you won’t know what parts you need or if they will fit. You can go online to get inspiration for what designs suit your space and what you wish to avoid.
Gather Your Outdoor Shower Materials and Equipment
Emmert Wolf once wrote, “A man is only as good as his tools.” And that’s certainly the case in a building project.
Countless outdoor shower ideas require different materials and equipment. However, the most popular ones you can use in almost any design are below.
- Electric drill
- Circular saw
- Step ladder
- Bubble level
- A Shovel
- Tape measure
- Nylon plumbing tape
Once you gather your tools and equipment, you can pick up the following materials:
- Showerhead
- 80 inches of galvanized piping
- Lengthy garden hose
- Silicone caulk
- Shower faucet
- Decking screws
- Two 90° galvanized pipe elbows/joints
- Quick set concrete
- C shaped hangers
- Shower doors
- 7-8 feet pressure-treated wood
Attach Your Piping and Water Source
After locating your water source, you can get to work building your project. And the first place to start is with the piping and water.
The easiest part of the project is attaching your garden hose to an outdoor spigot at one end. At the other end, connect it to the piping of your shower.
Use your elbow pipes/joints to connect the piping to the plumbing in the shower. You can use plumbers’ tape at every joint to prevent leaking.
Install Your Shower Post
Dig a hole in the space for your shower at least two feet deep and insert a 7-8 feet wooden post. Then, secure it with quick-set concrete and leave it dry for 24 hours to be safe.
Once it’s dry, you can add piping to the post. Using your c shaped hangers, screw the piping up the back of the wood. Now you can connect the garden hose to the bottom of the pipe.
You can use a hose coupler if the hose doesn’t fit directly into the pipe.
Add Your Showerhead and Doors
Your piping should now run the length of your post. At the top, attach your showerhead to the end of the pipe.
Turn on the eater from the source and give it a test run. If you attached everything correctly, the water should flow out of the shower head.
When everything is up and running, attach the best outdoor shower doors. And enjoy your homemade outdoor shower!
Build Your Outdoor Shower Today
Day by day, outdoor showers grow in popularity. Whether you’re rinsing off or cooling down, it provides plenty of benefits.
After reading this guide, you learned how to build an outdoor shower and what materials you need. So now it’s time to make some free time to start planning this fantastic DIY project!
If you want to discover more ways to make the most of the outdoors, keep reading our blog today!