Are you looking to give your room a polished and poised look? Then Venetian plaster is a good choice. This lime plaster gives a marble-like finishing, which you can make more versatile by adding tints of your choice. This type of plaster is best suited for places that have a curved surface, and installing marble or engraving becomes difficult. In such a case, Venetian plaster makes it easy for the user to apply it on pillars or columns.
Key Features Of Venetian Plaster:
The history of Venetian goes back to 500 years ago when it was used in the Renaissance period. Made from lime putty and marble dust, this plaster is a good choice for those who are willing to get a marble finish. Here are some of the key features of Venetian plaster:
- This plaster comes with waterproofing and antibacterial properties.
- Easy to clean
- Heat resistant
- A good alternative to paint and tiles
- Good for high traffic areas
- Environment-friendly
- Good reflective properties
- You can get it tinted to get a more contemporary appeal.
Steps Of Application Of Venetian Plaster
With so many features, this plaster is a must for those who are looking for a seamless finish. To achieve this, you would need the right application of the same. Below mentioned steps of application will help you out:
- Preparing the surface- The first step is to make the surface ready for the application of plaster. You must clear the surface of any dust or crack. In case you notice any gaps, fill it up so that the plaster appears seamless.
- First coat- The application of the first coat is made when the surface is ready for it. To get through with the application of first coat, you would need a trowel or drywall knife, which is 4-6 inches wide. Take the Venetian plaster and spears it in different lengths using a trowel or drywall knife.
- Second coat- Once you have applied the first coat (make sure it is thin), once it has dried, you can begin with the application of the second coat. Keep the drywall knife and trowel at 60 degrees or 90 degrees and start applying a second coat in X-shape. Once the application is complete, you must leave it to dry. It will require 24 hours to make this coat dry. You can now move to the topcoat. The topcoat is usually recommended for high traffic areas. In case you want to give it a burn finish, you can do so by rubbing the surface with sandpaper and then wiping the dust off. This will give it a more polished look.
Conclusion
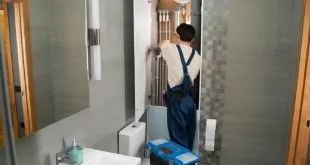
Venetian plaster application is easy, and it gives a luxurious appeal to the surface where it is applied. However, you must have good professional doing the same. Make sure that you hire a good contractor to take over this task. There are many Venetian plaster contractors in the market, but when it comes to choosing the one, and then you must start enquiring about their work. Look for an experienced professional who can not only guarantee to complete the task on time but also does it flawlessly. Do a bit of sleuthing, and don’t forget to inquire about the pricing for their work. Once you have discussed all these pointers, and both of you agree, you can have over the task to the person. In case you are not sure about the contractor, enquire about the references from your peer. With all these steps, you will have the right professionals working for you.